Proper installation is key to unlocking the full performance of mineral wool ceiling panels—from acoustic efficiency to long-term durability. This blog provides a step-by-step breakdown of the 4 most common installation methods for Pano Ceilings mineral wool panels, including suspended grid, direct粘贴, nail-up, and adhesive-only. We also cover essential prep work, tools needed, common mistakes to avoid, and how installation impacts panel performance. Whether you’re a professional contractor or a DIY enthusiast, this guide ensures your Pano Ceilings installation is seamless, efficient, and long-lasting.
Detailed Description
Installing mineral wool ceiling panels might seem straightforward, but using the wrong method or cutting corners can lead to sagging, poor acoustic performance, and premature wear. Pano Ceilings mineral wool panels are engineered for versatility, compatible with multiple installation techniques to suit different spaces (e.g., commercial offices, residential basements, schools) and substrates (e.g., concrete, drywall, wood). Below, we break down everything you need to know—from prep work to post-installation checks—to get the most out of your Pano Ceilings panels.
1. Essential Prep Work: Lay the Foundation for Success
Before picking up a tool, proper preparation ensures your installation goes smoothly and meets industry standards. Skipping these steps often leads to rework, so don’t rush this phase.
a. Assess the Installation Space
First, evaluate the room’s conditions to choose the right installation method:
• Ceiling Height: Spaces with ceilings over 3m benefit from suspended grid systems (easy access to utilities above). For low ceilings (<2.7m), direct粘贴 or nail-up methods save space.
• Substrate Type:
◦ Concrete/drywall ceilings: Compatible with all methods (suspended grid, adhesive, direct粘贴).
◦ Wood joists: Ideal for nail-up or adhesive-only installation.
◦ Existing drop ceilings: Retrofit with Pano panels using the existing grid (check grid weight capacity first).
• Moisture Levels: High-humidity areas (bathrooms, coastal rooms) require moisture-resistant adhesives and sealed edges—opt for Pano’s MoistureShield panels paired with suspended grid (allows airflow to prevent mold).
• Utilities Access: If you need to access electrical wiring, HVAC ducts, or plumbing above the ceiling, suspended grid is mandatory (panels can be easily removed and reinstalled).
b. Gather Tools & Materials
Having the right tools on hand prevents delays. Here’s a complete list for Pano Ceilings installations:
• Basic Tools: Tape measure, level (2m+), pencil, utility knife, straightedge, ladder/scaffolding, safety goggles, gloves.
• Method-Specific Tools:
◦ Suspended grid: Grid cutter, wire cutters, ceiling anchors, hanger wires (12-gauge).
◦ Direct粘贴/nail-up: Drill (for pilot holes), nails (16-gauge galvanized), adhesive trowel.
◦ Adhesive-only: Notched trowel (6mm), caulking gun, adhesive (Pano-recommended acrylic-based).
• Materials: Pano Ceilings panels, panel trim (optional, for clean edges), sealant (for moisture-prone areas), grid components (main tees, cross tees, wall angles).
c. Prepare the Panels
Pano Ceilings panels come in standard sizes (600x600mm, 1200x600mm) but may need cutting for edges, light fixtures, or vents:
1. Measure the area to be cut and mark the panel with a pencil and straightedge.
2. Score the panel’s surface with a utility knife (apply firm, even pressure).
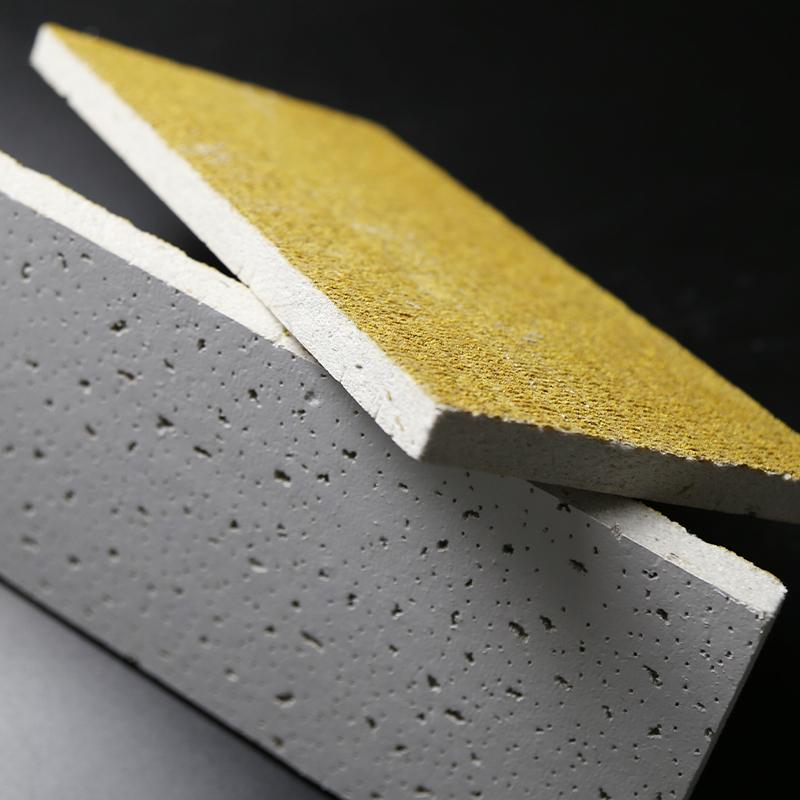
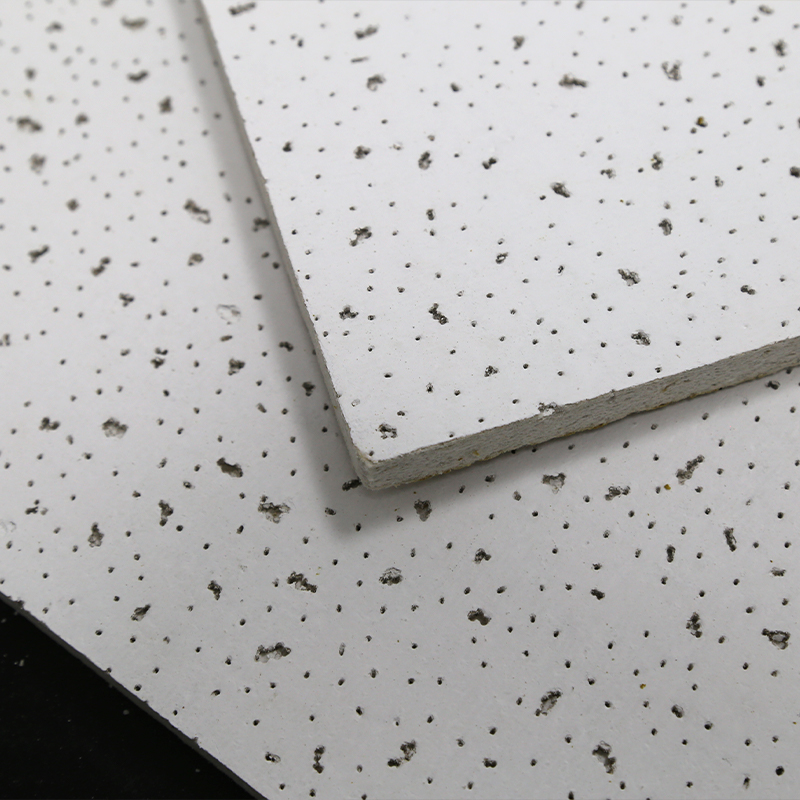
3. Snap the panel along the scored line—Pano’s dense mineral wool core ensures clean, straight cuts with no fraying.
4. For holes (e.g., light fixtures), use a hole saw (match the fixture’s diameter) and sand the edges for a smooth finish.
Pro Tip: Cut panels in a well-ventilated area and wear a dust mask—mineral wool fibers are non-toxic but can irritate airways.
2. 4 Key Installation Methods for Pano Ceilings Panels
Pano Ceilings mineral wool panels are designed to work with the 4 most widely used installation techniques. Below is a step-by-step guide for each, plus pros, cons, and ideal use cases.
a. Suspended Grid Installation (Most Common for Commercial Spaces)
Suspended grid (also called drop ceiling) is the go-to method for offices, schools, and hospitals. It involves hanging a metal grid from the ceiling joists, then placing panels into the grid. This method offers easy access to utilities and works with all Pano panel sizes.
Step-by-Step Process:
1. Install Wall Angles: Attach L-shaped wall angles (1.2mm thick) to the room’s perimeter using nails or screws (space fasteners 300mm apart). Ensure the angles are level—use a 2m level to check.
2. Hang Hanger Wires: Mark the ceiling joists (use a stud finder) and drill holes every 1200mm. Insert ceiling anchors, then tie 12-gauge hanger wires to the anchors (leave 300mm extra length for adjustments).
3. Install Main Tees: Main tees (48mm wide) run parallel to the room’s longest wall. Hang them from the hanger wires (adjust height to the desired ceiling level) and secure with wire clips. Space main tees 1200mm apart.
4. Add Cross Tees: Insert cross tees perpendicular to main tees, snapping them into the main tee slots. Space cross tees 600mm apart to match Pano’s standard panel size (600x600mm).
5. Place Pano Panels: Lower Pano Ceilings panels into the grid (panels rest on the grid’s lips). Ensure panels fit snugly—no gaps between edges. For cut panels, trim to fit the remaining space and insert.
Pros:
• Easy access to utilities (panels lift out in seconds).
• Hides uneven ceiling substrates.
• Ideal for large commercial spaces.
Cons:
• Reduces ceiling height by 150–300mm.
• Requires more tools and materials than other methods.
Ideal Use Cases: Offices, schools, hospitals, retail stores.
b. Direct Adhesion Installation (Space-Saving for Residential Use)
Direct adhesion (gluing panels directly to the ceiling substrate) is perfect for residential spaces like basements or bedrooms, where ceiling height is limited. It’s fast, cost-effective, and works with smooth substrates (concrete, drywall, wood).
Step-by-Step Process:
1. Prepare the Substrate: Ensure the ceiling is clean, dry, and flat (fill cracks with spackle and sand smooth). Remove dust with a damp cloth—adhesive won’t bond to dirty surfaces.
2. Apply Adhesive: Use a 6mm notched trowel to spread Pano-recommended acrylic adhesive onto the back of the panel (cover 80% of the surface for full adhesion). Avoid applying adhesive to the edges (prevents oozing).
3. Position the Panel: Press the panel firmly against the ceiling, starting from the corner of the room. Use a level to ensure the panel is straight—adjust within 2 minutes (before adhesive sets).
4. Secure with Temporary Fasteners (Optional): For heavy panels (e.g., 25mm thick), insert 1–2 galvanized nails into the panel’s corners to hold it in place while adhesive dries (remove nails after 24 hours).
5. Seal Joints: Once adhesive is fully cured (24–48 hours), apply a thin bead of acrylic sealant along panel joints for a seamless finish (critical for moisture-prone areas).
Pros:
• Preserves ceiling height.
• Fast installation (10–15 panels per hour).
• Low material costs.
Cons:
• No access to utilities above the ceiling.
• Requires a smooth, even substrate.
Ideal Use Cases: Residential bedrooms, basements, small home offices.
c. Nail-Up Installation (Durable for High-Traffic Areas)
Nail-up installation involves nailing panels directly to wood joists or furring strips. It’s highly durable, making it suitable for high-traffic spaces like gyms or workshops, where panels may face minor impacts.
Step-by-Step Process:
1. Install Furring Strips (If Needed): If the ceiling has no wood joists (e.g., concrete), attach 2x4 furring strips (spaced 600mm apart) to the ceiling using concrete anchors. Ensure strips are level.
2. Mark Panel Positions: Use a pencil to mark where panels will align with joists/furring strips (panels should overlap strips by at least 25mm for secure nailing).
3. Nail the First Panel: Position the panel against the corner, aligning it with the marked joists. Drive 16-gauge galvanized nails (25mm long) through the panel into the joist—space nails 150mm apart along the edges and 300mm apart in the center.
4. Install Subsequent Panels: Fit the next panel tightly against the first (no gaps) and nail it to the joists. For a clean look, stagger panel joints (avoid aligning joints in adjacent rows).
5. Trim Edges: Cut panels to fit the room’s perimeter and nail them in place. Use trim molding to cover exposed edges (optional but recommended for aesthetics).
Pros:
• Extremely durable (resists sagging and impacts).
• Works with uneven substrates (furring strips level the surface).
Cons:
• Labor-intensive (requires precise nailing).
• No utilities access.
Ideal Use Cases: Gyms, workshops, garages, utility rooms.
d. Adhesive-Only Installation (Quick Retrofit for Existing Ceilings)
Adhesive-only installation is a minimal-effort method for retrofitting over existing ceilings (e.g., old drywall or plaster). It’s best for small spaces and lightweight Pano panels (12–15mm thick).
Step-by-Step Process:
1. Prep the Existing Ceiling: Clean the ceiling to remove dust, grease, and loose paint. Repair any peeling areas with spackle—adhesive bonds poorly to damaged surfaces.
2. Apply Adhesive Dots: Use a caulking gun to apply 25mm-diameter dots of adhesive to the back of the panel (place 4 dots in the corners and 2 in the center). Space dots 300mm apart.
3. Press the Panel into Place: Align the panel with the room’s corner and press firmly against the ceiling. Hold for 30 seconds to ensure the adhesive bonds—use a level to check straightness.
4. Repeat for All Panels: Install subsequent panels with tight joints (≤1mm gap). For larger panels, have a helper hold the panel while you press to avoid misalignment.
5. Allow Curing Time: Let the adhesive cure for 48 hours before painting or adding fixtures (Pano panels are paintable with water-based latex paint).
Pros:
• No drilling or nailing (preserves existing ceiling).
• Fastest installation method (5–10 panels per hour).
Cons:
• Only for lightweight panels and sound substrates.
• Not suitable for high-moisture areas.
Ideal Use Cases: Small offices, bedrooms, rental properties (non-permanent modification).
3. Pro Tips for Perfect Pano Ceilings Installation
Even experienced contractors can make mistakes—follow these tips to ensure your installation is flawless:
a. Prioritize Leveling
A uneven ceiling ruins aesthetics and causes panels to sag. Use a 2m laser level for wall angles, grid tees, and furring strips—even a 2mm deviation can lead to visible gaps over time.
b. Choose the Right Adhesive
Not all adhesives work with mineral wool. Use Pano-recommended acrylic-based adhesive (resists moisture and bonds strongly to mineral fibers). Avoid solvent-based adhesives—they can degrade the panel’s core.
c. Leave Expansion Gaps (For Large Spaces)
In rooms over 10m long, leave a 5mm expansion gap between panels and the wall. Mineral wool expands slightly with temperature changes—gaps prevent warping.
d. Cut Panels for Fixtures First
Install light fixtures, vents, or smoke detectors after cutting panels (not before). Measure fixtures twice to avoid mistakes—Pano’s dense core is easy to cut but hard to repair.
e. Seal for Moisture
In bathrooms or kitchens, apply silicone sealant along all panel joints and edges. Pair with Pano’s MoistureShield panels to prevent mold growth and water damage.
4. Common Installation Mistakes to Avoid
These errors are the top causes of installation failures—steer clear of them:
a. Skipping Substrate Prep
Dirty, damp, or uneven substrates lead to poor adhesion. Spend time cleaning and leveling—this step saves you from re-installing panels later.
b. Over-Tightening Grid Components
Pulling hanger wires too tight or forcing grid tees together bends the metal, leading to uneven panels. Leave slight slack in wires for adjustments.
c. Using Wrong Fasteners
Non-galvanized nails rust over time, staining panels. Use galvanized or stainless-steel fasteners to match Pano’s durability.
d. Rushing Adhesive Curing
Installing fixtures or painting before adhesive dries (24–48 hours) pulls panels loose. Be patient—curing time ensures a permanent bond.
e. Ignoring Weight Limits
Suspended grids have weight limits (typically 10kg/m²). Don’t hang heavy fixtures (e.g., chandeliers) from the grid—anchor them directly to the ceiling joists.
5. How Installation Impacts Pano Ceilings Performance
Proper installation isn’t just about aesthetics—it directly affects how well your Pano panels perform:
a. Acoustic Performance
Gaps between panels let sound escape, reducing NRC (Noise Reduction Coefficient) by up to 30%. Tight joints and sealed edges ensure Pano’s 0.75+ NRC rating delivers maximum sound absorption.
b. Durability
Panels installed on uneven grids or weak adhesives sag over time (visible after 6–12 months). Level installation and full adhesion keep panels flat for decades.
c. Moisture Resistance
Poorly sealed joints in high-humidity areas let water seep into panels, causing mold and delamination. Proper sealing preserves Pano’s moisture resistance (≤5% water absorption).
d. Energy Efficiency
Gaps between panels allow heat transfer, lowering R-value (thermal resistance). Tight installations maintain Pano’s R-value of 3.2 per inch, cutting HVAC costs.


